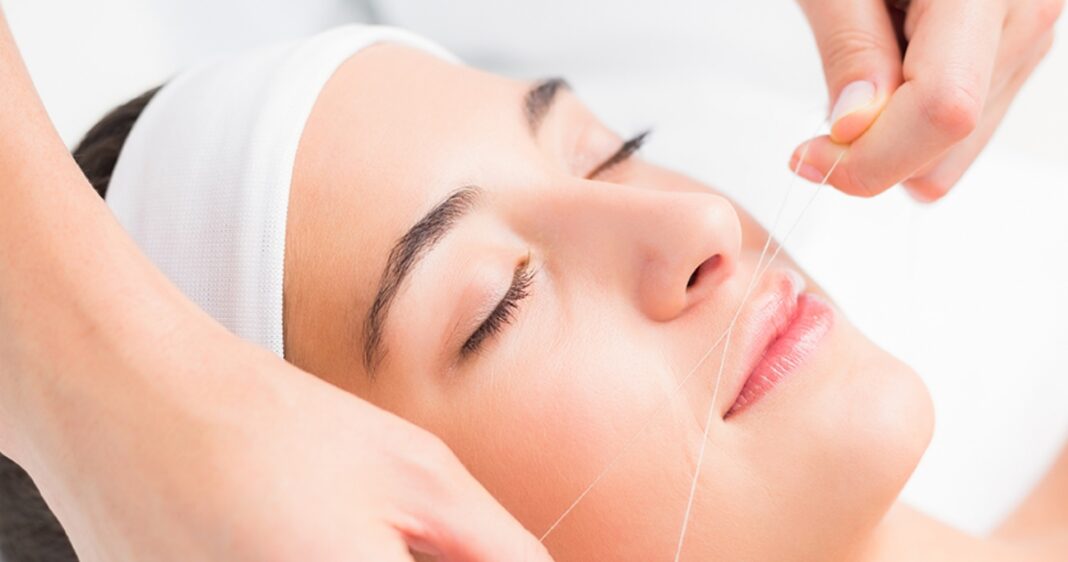
Upper lip threading is one of the most traditional hair removal methods on the upper lip. Originating from Iraq and India as a method to groom eyebrows and finding its way to China as the most recommended method of removing hair from the face, threading is popular worldwide to eliminate unwanted hair from the upper lip.
It is less invasive and requires almost no tools, making it one of the best upper lip hair removal methods if you are skilled enough. There is much more to upper lip threading than you might be aware of, so let’s get to know what it is.
Table of Contents:
- Part 1: Advantages of Threading Upper Lip
- Part 2: Disadvantages of Threading Upper Lip
- Part 3: Upper Lip Threading Before and After
- Part 4: Upper Lip Threading Cost
- Part 5: Threading or Waxing Upper Lip: Comparison
- Part 6: How to Remove Upper Lip Hair by Threading
- Part 7: How to Get Rid of Bumps After Threading
- Part 8: What to Do After Threading Upper Lip
Part 1: Advantages of Threading Upper Lip
First of all, let us discuss why threading maintains its place in the hair removal industry despite the 10s of other methods available by learning about threading upper lip hair pros and cons. Below are the advantages of threading the upper lip.
- Precise hair removal: Unlike other methods of hair removal where you might leave a hair or two behind, you can get all of the hair removal with threading in a well-lit room.
- Removing hair of any length and any type: Some methods of hair removal want the hair to be a particular length for it to be removed. However, threading can remove the shortest of the hair regardless of its color, type, and texture.
- Fast hair removal: Threading the upper lip hair does not take much time and the full mustache can be removed within 10 minutes. It is the most recommended hair removal method for small areas as well.
- Suitable for sensitive skin: Threading works superficially and does not contact the skin, making it safe for people with sensitive skin types.
- Results lasting for a long time: Threading pulls each strand of hair from the roots with strength. Consequently, hairless upper lips last for a month or more.
Part 2: Disadvantages of Threading Upper Lip
Now, let’s examine the disadvantages of threading upper lips to help you decide whether to let a thread near your face.
- Painful hair removal: The idea of having each strand of your hair trapped and twisted in a thread before being pulled out is scary. And threading is painful just like that.
- Skin inflammation: If the hair is thick or coarse, it is pulled with greater force causing small bumps and inflammation on the skin. Additionally, if the skin is not well-cleaned, its pores can be blocked.
- Slower than shaving and waxing: Although 10 minutes is not a long time, it is not short either when compared with 2 minutes of shaving and 5 minutes of upper lip waxing.
- Requires skills: Threading needs to be done by an expert esthetician to prevent side effects or you will have to practice to gain enough skills to play with the thread and your upper lip hair.
- Can cause skin tears and scars: If the skin gets stuck in the thread by any chance, it can be torn. And this tearing can cause a bruise or a scar in that area.
Part 3: Upper Lip Threading Before and After
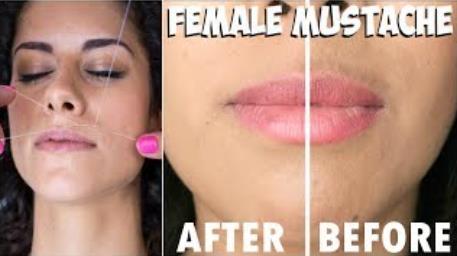
After knowing upper lip threading pros and cons, it is mandatory to know what your mustache or unwanted upper lip peach fuzz looks like after being removed with the help of a thread.
Below are the upper lip threading before and after results.
In this image, the women have thin upper lip hair which is efficiently removed with the help of a thread. Also, note that the thread is being used by an expert lady leading to such seamless results.
In this image, the hair is a little thicker than in the image above. But the after image shows how well the thread takes care of this unwanted upper lip hair.
Part 4: Upper Lip Threading Cost
The following information shares the details of how much threading costs.
Cost of In-Salon Threading Treatments
If you go for in-salon threading upper lip treatments, you will see a variety of different packages. These depend upon the region, location of the salon, pre and post-care products, and the esthetician itself. For example, its average cost is $5 in California, $8 in New York, $10 in Florida, and $15 in some other regions.
So, the upper lip threading cost in the USA varies from $5 to $20.
Cost of At-Home Threading
If you would rather thread the upper lip hair at home, all you need is thread or threading tools. A good quality cotton thread can do the job well. However, you have to be skilled at threading at home.
In other cases, a threading tool costing around $25 can be used for beginners.
Ways to Get Upper Lip Threading at an Affordable Cost
The most affordable way of threading upper lip hair is doing it yourself. However, it is not very convenient. So, you can opt for a salon that is offering a discount, is less popular, is offering some promotions, or has special packages for certain professions like military personnel, doctors, or students.
Part 5: Threading or Waxing Upper Lip: Comparison
Below is the comparison of upper lip threading vs. waxing upper lips.
Method
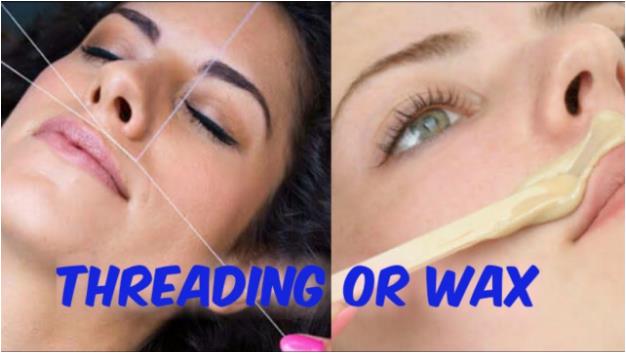
In threading, a thread or threading tool is used to grab the hair and remove it from the roots mechanically by twisting it. However, wax is used in waxing to stick to the hair and remove it from the roots upon pulling it off. Stripless wax and prepared waxing strips can also be used for upper lip hair removal.
Pros
Here are the benefits of threading and waxing side by side.
| Threading | Waxing |
|
|
Cons
Here is a comparison of the drawbacks of waxing and threading upper lips.
| Threading | Waxing |
|
|
Factors to Consider
The most important factor to consider while choosing a hair removal method for upper lips is your skin type. If your skin is sensitive, threading is the way to go. However, you have to keep your pain tolerance in mind as threading is more painful making waxing the upper lip a better option.
Part 6: How to Remove Upper Lip Hair by Threading
Let us discuss the details of how to get rid of upper lip hair by threading.
Step-By-Step Guide
Step 1: Skin Preparation
Wash your skin well with a skin-friendly cleanser. Then apply ice over it to make it numb to the pain of threading. Let it dry and apply talcum powder over it to make the threading easy.
Step 2: Prepare the Thread
Take a 2-foot-long cotton thread. Ensure that it is clean. Then hold its two ends and tie them into a knot. Hold the thread from both sides in between your index finger and thumb and twist it 10 to 15 times. Your thread is all ready.
Also, practice moving the thread as it is and try removing hair from the legs first before moving onto the upper lips.
Step 3: Thread the Upper Lip
Pull the skin of the upper lip taut with the help of the tongue. Place the twisted part of the thread on the hair and move one side of it with your thumb and finger in a way that the twist moves and grabs the hair. Remove this hair and move on to the next section.
Step 4: Do Post-Threading Skincare
Skin feels red and painful after threading. So, apply a moisturizer or a soothing get over that area.
Recommended Tools for Upper Lip Threading
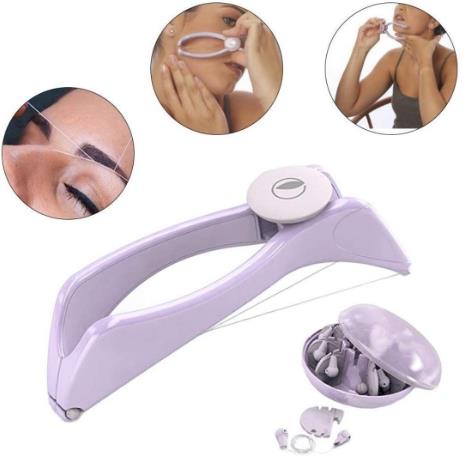
There is a threading tool with a thread in the middle and plastic handles on the sides. It works manually by movement of a single hand and does not need much effort to remove the hair. The image of this tool is shown below.
In addition to this, you can simply get a vanity thread from Amazon for a nice facial hair removal.
Precautions to Take
To have the threading go nearly painlessly and without damaging the skin, you can try:
- Taking a painkiller 30 minutes before threading
- Using ice cubes to make the skin numb
- Applying talc powder to create a layer between the hair and the skin
Part 7: How to Get Rid of Bumps After Threading
Skin redness and bumps are a common recurrence after threading the upper lip. Redness is caused by the painful hair removal process and bumps are a result of trauma to the skin. They can also be caused by clogging of the pores after threading skin having dead skin cells and excess oils.
Although these are temporary side effects of threading upper lip hair that go away on their own within a few hours to days, it is best to avoid them, right? So, you can take the following measures to avoid these:
- Exfoliate the skin 1 day before you thread the upper lip.
- Ensure that your skin is thoroughly cleansed and has no residues of makeup or skincare products on it.
- Your skin must be free of impurities, oils, and dust.
- A new thread should be used every time before threading any area. And hands of the threading expert should also be clean.
- A talc powder helps in preventing sweat.
Part 8: What to Do After Threading Upper Lip
Below are some measures to be followed for flawless upper-lip hair removal with a thread.
Dos
- Always wash your face thoroughly with cold water or an ice water bath to close the pores that have been opened after threading.
- After washing the face, comes a rich moisturizer to soothe the skin and make it healthy.
- You can also use aloe vera gel or rose water regularly to hydrate the skin.
- Keep using sunscreen and sunscreen sticks to prevent sun rays from damaging your sensitive skin.
- Make an effort to search for a skin-friendly thread, expert estheticians, and a trustworthy clinic to have the hair removed from the upper lip.
Don’ts
- To prevent infection, the upper lip area should not be touched repeatedly after threading, and it should never be touched with unclean hands.
- A hot shower or warm water face washing opens the pores and irritates the skin. So, you should maintain the temperature of water coming in contact with your face.
- Exfoliation and harsh products must be avoided for a day or 2 after threading the upper lip hair.
Conclusion
Upper lip threading is the top choice for facial hair removal in delicate areas like the face. It is suitable for sensitive skin and affordable and can be done with minimal apparatus, as all you need is a thread. Moreover, let us not forget that waxing lasts a week or longer than waxing.
Although the procedure is safe for the skin, the right threading protocol must be followed to avoid undesired adverse effects. So, you must practice the technique to become skillful enough to do it yourself or just head to a reliable salon.
Additionally, you should enlist its potential side effects, risk factors, pre and post-treatment preparation, expectations, and results beforehand. This will help you get the best results.
